Categories
Plumbing

Locking Hose Bib vs Standard Bib: Is the Upgrade Worth It?

Outdoor faucets are both useful and exposed. This introduction explains how Water Hose Locks and related hardware guard spigots, reduce unauthorized use, and reduce water waste. It offers practical solutions for homeowners, businesses, and institutions across the United States. These measures are especially valuable in drought-prone regions where Lock Water Hose solutions are becoming more common.

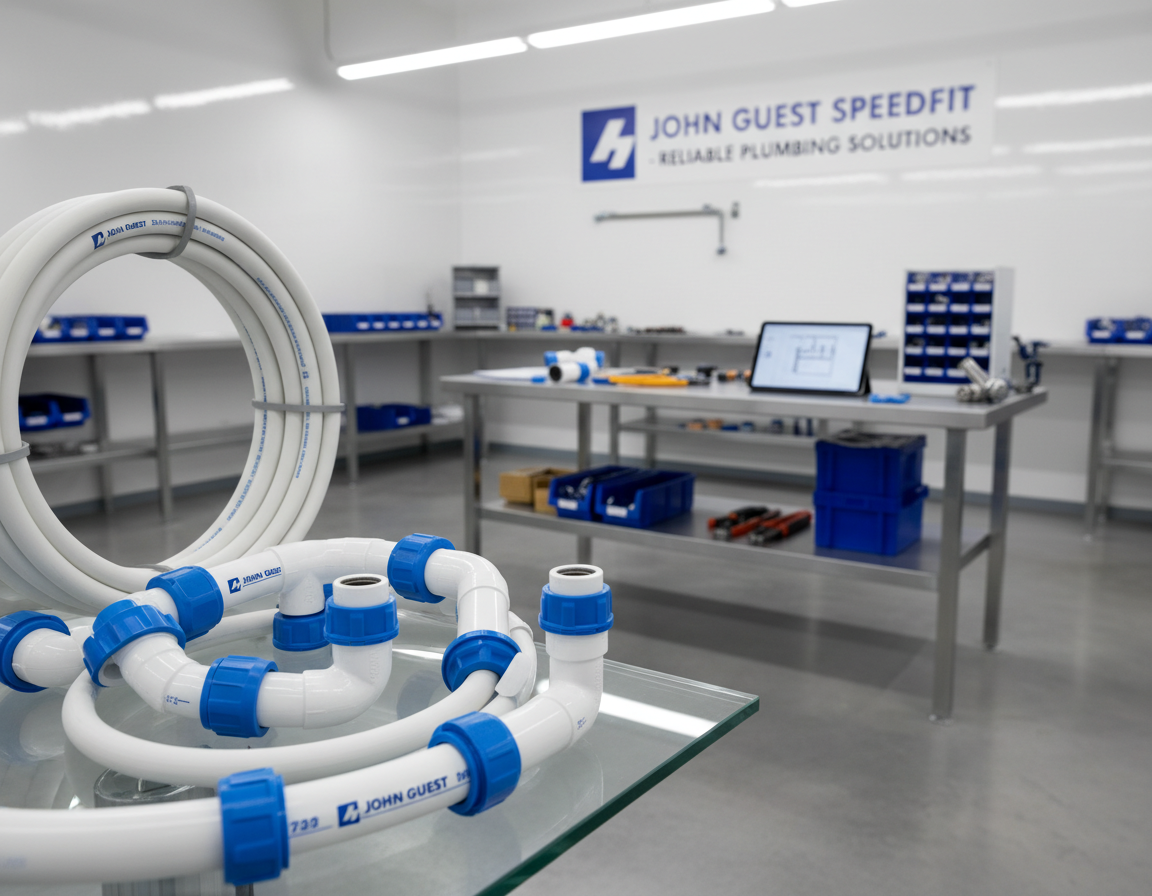
This article reviews several solutions, including Hose Lock styles, Water Faucet With Lock designs, and vandal-resistant boxes such as the AA-HB-100 stainless steel model. It also examines lever-handle locks, quarter-turn faucet locks, and keyed or combination Lock For Water Spigot options. Readers will see how to choose a suitable lock, handle basic installation, and maintain the hardware over time.

Installation Parts Supply (https://installationpartssupply.com) is featured as a trusted online source for faucet locks, lock boxes, and compatible parts. It supports both homeowners and plumbing professionals. Using these locks can reduce theft, cut utility costs, reduce water waste, deter vandalism, and improve property security.

Why Outdoor Faucet Security Is Important For Homeowners And Businesses

Outdoor faucets, though simple, can cause significant issues if not secured. An unlocked spigot can waste water, drive up utility bills, and allow unauthorized access to private water lines. Installing a Locking Hose Bib or Hose Bibb Lock helps control these risks and protect property value.

In states like California, where water is scarce, theft is on the rise. Reports involving unauthorized tapping of hydrants, municipal stations, and residential spigots have become more common. A Lockable Hose Bibb or Lock For Water Spout acts as a visible deterrent, discouraging casual misuse and helping prevent large meter charges.

Unsecured spigots can lead to more than just high bills. They can cause flooding, landscape erosion, foundation seepage, and basement damage. Installing a Lock For Water Faucet or Hose Bibb Lock can greatly lower the risk of costly repairs, insurance claims, and legal liability.

Communities under water restrictions rely on compliance to manage limited supplies. Securing private taps with Locking Hose Bibs and enclosure box locks strengthens conservation efforts. Municipalities can support water rules more effectively, while neighbors benefit when outdoor outlets stay secured during drought periods.

When choosing a Locking Hose Bib or similar device, it is important to consider site needs, faucet type, and local rules. Buying a quality Lock For Water Spout or Lock For Water Faucet is a practical step that helps protect assets, conserve water, and support community goals.

How Different Water Hose Locks Work

Choosing the right device for a lockable water spigot is based on faucet style, usage needs, and desired security. Below are common options, how each one works, and the settings where each fits best.

Locking Hose Bib

Cap Locks And Hose Bibb Locks

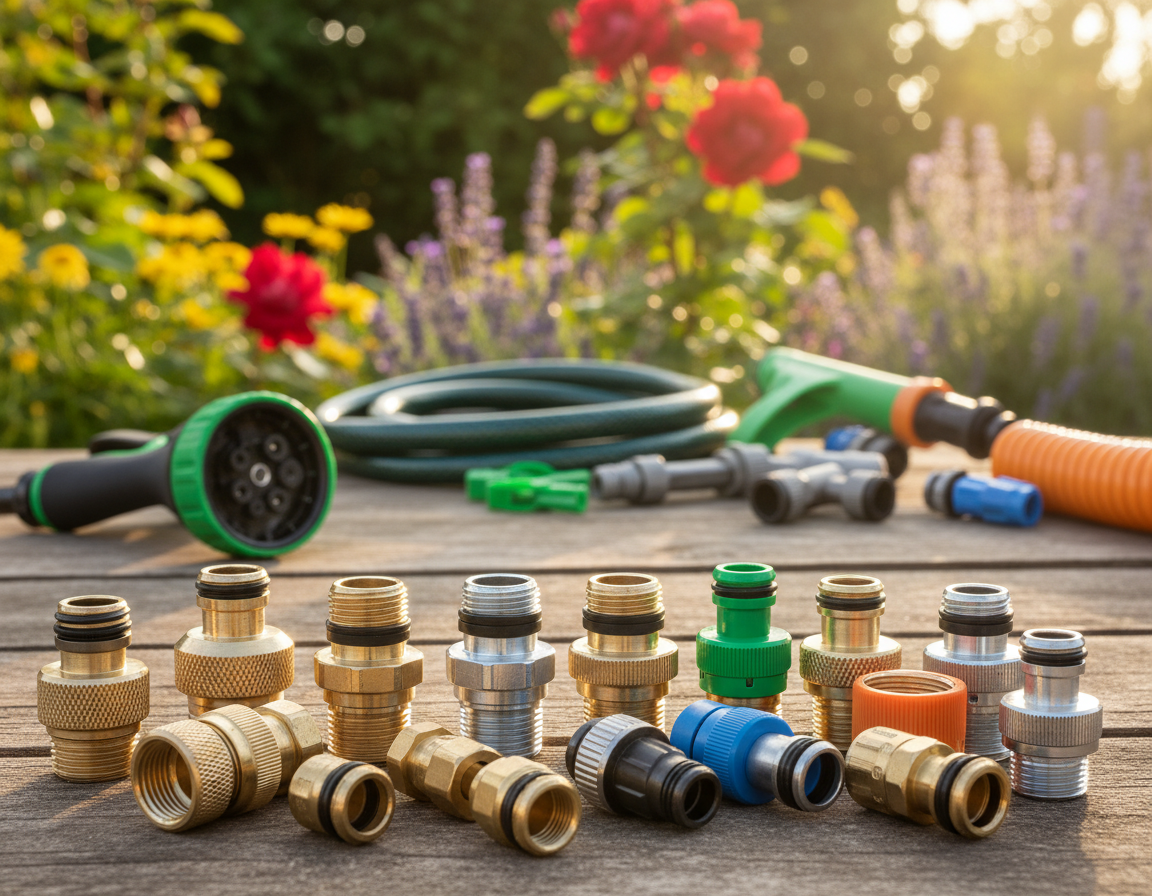
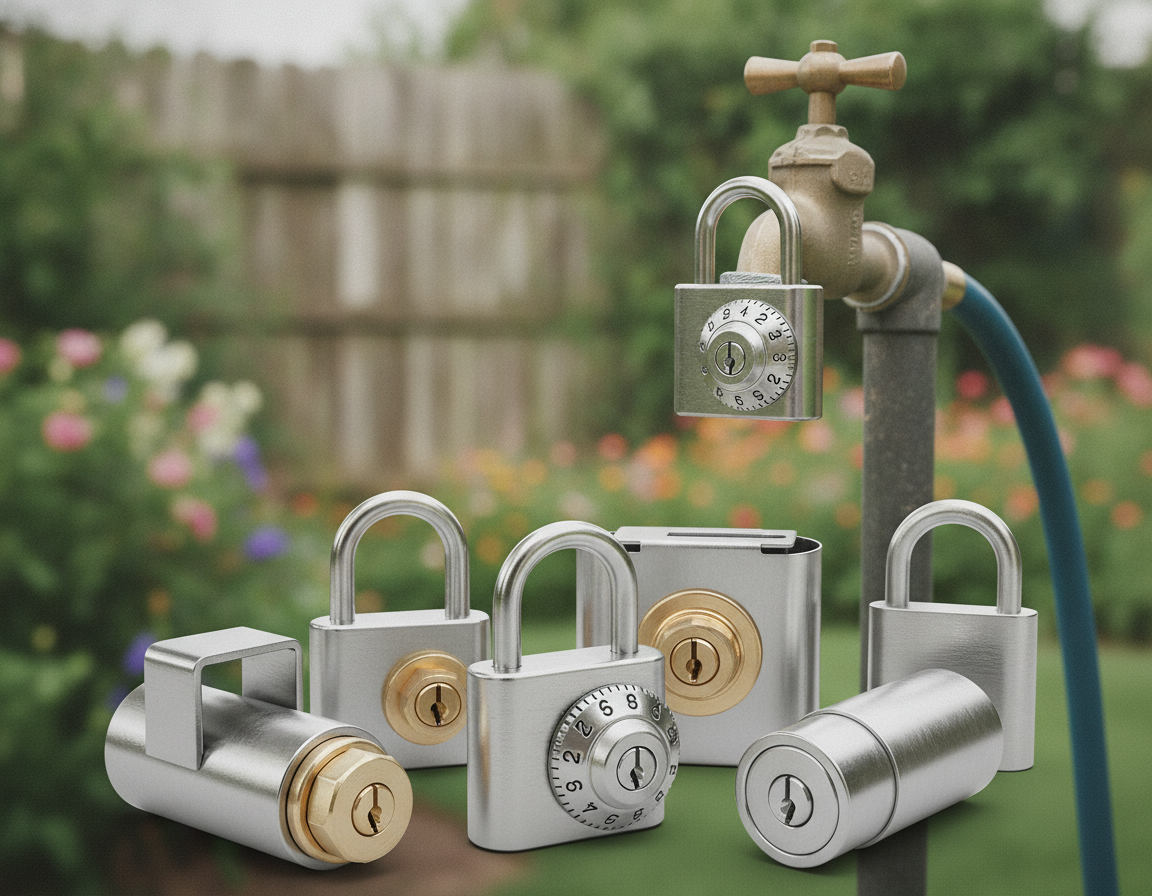
Hose bibb locks usually include a metal cap or sleeve that slides over the spigot opening and locks into place. The cover blocks the hose threads and stops a hose from attaching or water from being turned on.

These caps are usually affordable and made for outdoor weather exposure. They commonly fit standard garden-hose threads and work well on round-handle spigots at homes, rental properties, and small businesses. For simple theft prevention, a hose with lock or spicket lock cap is a practical choice.

Vandal-Proof Enclosure Box Locks

Enclosure boxes cover the faucet and bibb inside a lockable metal or plastic housing. The box blocks access to both the handle and hose connection, providing strong protection in public, commercial, or industrial locations.

Heavy-duty stainless lock boxes are often designed for cut resistance, weather exposure, and long service life. These boxes work with padlocks or integrated cylinders and are preferred where a visible deterrent and maximum theft resistance are required for locks for hose bibs.

Quarter-Turn And Lever Handle Faucet Locks

Lever and quarter-turn locks fit over modern handle shapes and stop the handle from rotating. They attach around the lever so the valve cannot open until the lock is removed.

These locks are made for newer faucets with flat, lever, or quarter-turn handles. They are usually not suitable for classic round-handle spigots. A Flow Lock that secures the handle can be an effective option for properties with modern faucets.

Combination, Keyed, And Padlock Solutions

Locking mechanisms may use keyed cylinders, combination dials, and standard padlocks paired with shrouds. Keyed locks provide strong security but need key control. Combination locks make shared access easier because no physical key control is required.

Many enclosures and sleeves are padlock-ready and include hardened shrouds to resist cutting. Choosing between a keyed spicket lock and a combination-style hose with lock is shaped by how often access is needed and who needs it.

Type Ideal for Common materials Security level
Hose bibb cap lock Residential round-handle spigots Weather-resistant brass, zinc, or stainless Basic to medium
Vandal-proof enclosure box Commercial, public, and institutional taps Heavy stainless steel or durable polymer Strong
Handle clamp lock Updated faucets with lever handles Steel, aluminum, or reinforced polymer Medium to high
Padlock-ready or keyed systems Shared-use locations and varied properties Hardened steel and brass lock cylinders Moderate to high

How To Choose The Right Lockable Faucet Solution

Selecting the right lock depends on faucet style, location, climate, and budget. A properly matched lock helps secure outdoor water access while keeping normal authorized use practical. It also reduces trial and error, saving installation time and effort.

Match your lock to the faucet style

For round-handle hose bibbs, cap-style Lock For Hose models that slide over the valve are usually best. Quarter-turn and lever-handle spigots need clamp-style Locking Hose Bib fittings designed for those handle profiles. Freeze-proof spigots require lock designs that can fit inside insulated covers or attach behind the spout.

Assessing security level and location

In low-risk yards, an inexpensive cap or keyed Lock For Water Spout between $10 and $25 is often sufficient. For high-traffic or commercial sites, heavy-duty options like stainless steel Garden Hose Lock Box enclosures are necessary. When deciding how strong the lock should be, consider visibility, access requirements, and vandalism risk.

Climate factors and freeze protection

In cold regions, choose locks that work with insulated covers or select freeze-proof Lock For Hose products. These options are designed to remain installed through winter conditions. If outdoor lines need seasonal draining, remove the locking device before winter to reduce corrosion, ice damage, and cracking.

Budget and upkeep considerations

Basic cap locks are the most budget-friendly. Enclosure boxes cost more upfront, but stainless steel versions often provide longer service life. Consider the long-term savings from preventing water loss and unauthorized use. Choose corrosion-resistant finishes and plan routine lubrication so the lock continues to operate smoothly.

Outdoor Tap Type Recommended Lock Common Cost Best Use
Round-handle spigot Cap-style lock or keyed cap Usually $10 to $25 Residential areas with basic security needs
Lever-handle or quarter-turn faucet Lever-compatible clamp lock or padlock shroud $20–$60 Homes with modern faucets, moderate security needs
Public-facing faucet Stainless lock box or vandal-resistant enclosure About $75–$250 Commercial sites, parks, and high-risk areas
Frost-proof spigot Freeze-compatible lock or removable Lock For Water Spout About $25–$100 Outdoor faucets in freezing climates

Step-By-Step Installation And Locking Process

To install a lock for your water faucet, follow these steps carefully. Ensure the device fits snugly and functions as expected. Begin with a dry faucet and verify the threads and handle type. Remove any hoses, clear debris, and clean the mounting surface before proceeding.

How To Prepare The Faucet For Installation

First, turn off the water supply and open the faucet to drain remaining water. Dry the spicket or spigot so the spicket lock does not slip during installation. Inspect the threads for wear and confirm the handle style so you can choose the correct Lock For Water Faucet or Locking Hose Bib.

Fitting The Inner Sleeve And Securing The Lock Body

Many Lock For Water Spout products include an inner sleeve that lines up with faucet threads, grooves, or spout shape. Slide the sleeve over the spigot and ensure it is flush. Then hand-tighten the lock body over the sleeve. Do not over-tighten, because excess force can damage threads and cause early wear.

How To Secure Padlock And Integrated Lock Designs

For padlock-ready enclosures, slide the outer cover into place and align the shroud correctly. Insert a hardened padlock through the opening and lock it securely. For keyed or integrated locks, follow the manufacturer’s directions to engage the locking mechanism. Test the installation by trying to open the faucet with moderate force, without damaging the fixture.

Troubleshooting Common Installation Problems

Misaligned inner fittings can lead to wobble or loosening. If this occurs, re-seat the sleeve and re-tighten by hand. Confirm that the Locking Hose Bib is compatible with your faucet type to improve security and fit.

Rust, mineral buildup, or debris can interfere with fit and prevent smooth locking action. Clean the threads and apply a light lubricant rated for outdoor use. In freezing regions, drain water from lock cavities and consider insulated or removable designs to prevent cracking or damage.

Process Step What To Do Tip
Step 1 Turn off water supply and wipe spigot dry Open faucet to clear residual water and wipe with a clean cloth
Second Inspect threads and handle Confirm handle style before buying a lock
Step 3 Install the inner sleeve Stop if there is resistance and check alignment
Step 4 Secure the outer lock body Hand-tighten to secure without thread damage
Fifth Lock with padlock or built-in mechanism Use a hardened padlock for exposed spicket lock enclosures
Final Test security and correct problems Confirm the lock is secure and address any fit issues

Maintenance, Care, And Seasonal Upkeep For Hose Lock Systems

Routine care is important if you want locks to stay reliable and last longer. It is wise to inspect a Hose Lock or Flow Lock at least twice a year. Look for signs of rust, grit, or damaged threads that could jam the mechanisms. Use a dry cloth to wipe exterior surfaces and clear debris from moving parts.

Apply graphite-based lubricant to lock cylinders, hinges, and pivot points. Use light lubricants recommended by the manufacturer for stainless components. Heavy oils can attract dirt, so it is best to avoid them. Check screws, fittings, and the padlock shackle for wear. Tighten loose fasteners and replace worn hardware promptly.

Begin spring checks by testing every lock after thawing. Make sure keys, cylinders, and combinations work smoothly. For busy months, verify that repeated use does not loosen fittings. Inspect seals and gaskets on a Lockable Hose Bibb or Garden Hose Lock Box to prevent leaks and corrosion.

During summer, check sun-exposed plastic enclosures for UV damage. UV can weaken materials, so replace any faded or brittle parts. For commercial properties, document inspections for compliance, maintenance records, and liability management. A Flow Lock that binds under frequent use may need service or replacement.

Prepare for cooler months by pairing locks with insulated covers or selecting freeze-proof options. Drain hoses and exposed lines before temperatures drop. If ice could damage the mechanism, remove the lock or protect it to prevent cracking, binding, or shroud damage.

Follow the manufacturer’s care instructions for stainless hardware and warranty requirements. For example, adhere to specification sheets like AA-HB-100 when available. Proper maintenance helps Locks For Hose Bibs and Lockable Hose Bibb systems meet expected service life and warranty conditions.

Long-Term Durability: Product And Material Comparisons

The lock solution you choose affects security, upkeep, and total cost. This guide reviews common materials and styles to match performance with site needs. It highlights heavy-duty options for higher-risk locations and lighter choices for home use.

Stainless steel cases resist tampering, corrosion, and weather exposure very well. A 12-gauge Stainless Steel Lock Box is often ideal for outdoor use in public, institutional, and industrial areas. Look for vendor specs on warranty terms and country of manufacture for commercial models.

Plastic Enclosure units are cheaper and resist some chemical corrosion. They are lighter and easier to install around a Hose Bibb Lock on private property. They do not match stainless steel in forced-entry resistance, making them suitable for lower-risk homes.

Plastic Enclosures Vs. Stainless Steel Lock Boxes

Opt for stainless steel in high-risk areas facing vandalism or heavy use. Choose plastic when budget, weight, or specific chemical corrosion is a concern. Before deciding, consider expected lifespan, warranty coverage, weather exposure, and local climate.

Shroud And Padlock Compatibility

Many lock boxes offer a Padlock Ready Shroud for shrouded or shackle-less padlocks. This design reduces exposed shackle length and improves cut resistance. For better protection, use hardened steel padlocks or shroud-compatible locks.

Check product specs for clearance and shroud dimensions to ensure a proper fit. Keyed cylinders from reputable brands typically resist picking better than generic locks. Test fit before installation when possible.

Buying Quality Faucet Locks

Installation Parts Supply carries a variety of faucet security hardware for homeowners, plumbers, and property professionals. Retail home centers and online marketplaces often sell basic Hose Bibb Lock models for residential use. For heavy-duty stainless solutions, check manufacturer direct channels and industrial suppliers for detailed specs and samples.

Feature Steel Security Box Plastic Lock Enclosure Shrouded Padlock Feature Where To Purchase Faucet Locks
Protection level High protection against cutting and prying Moderate protection with less forced-entry resistance Improves protection with hardened padlocks Specialty suppliers, manufacturers, and Installation Parts Supply
Weather resistance Excellent outdoor durability and corrosion resistance Resists moisture but may degrade under UV over time Varies by material and coating Home centers for basic locks and specialty vendors for commercial units
Price More expensive initially but often longer-lasting Lower upfront cost; may need replacement sooner Moderate cost increase with better padlock protection Pricing varies, so compare specs and warranties
Ideal use Public, industrial, institutional sites Home yards and low-risk areas Anywhere needing improved shackle protection Buy from local or online sources based on required grade

Water Faucet Lock Cost, Warranty, And Value

When selecting a Lock For Water Faucet, it is essential to consider both the initial cost and long-term benefits. Hose Lock pricing varies by design, material, construction quality, and intended use. Understanding the Hose Lock Price and Warranty For Faucet Lock details is key to finding a balance between security and durability.

Hose Lock prices start at a low for basic caps and increase for more durable options. Cap and cap-style locks commonly cost about $10 to $25. Lever-handle clamps fall into a similar or slightly higher price range. On the other hand, commercial-grade stainless steel enclosure boxes and vandal-proof units are pricier due to their thicker steel and tamper-resistant features.

The real value of a Locking Hose Bib goes beyond its purchase price. It can prevent water theft and potentially save owners hundreds or even thousands of dollars. A high-quality Flow Lock or stainless enclosure can also reduce costly vandalism repairs and lower utility bills.

Warranty coverage is important when comparing brands and product grades. Look for manufacturers that offer detailed spec sheets and care instructions. Some 12-gauge stainless models may include vandalism warranties lasting close to a decade. Requesting material samples and reading warranty guides before buying supports compatibility with your local environment.

Reputable suppliers like Installation Parts Supply and mainstream hardware retailers provide detailed product information and replacement parts. Confirming warranty terms and maintenance requirements helps ensure that routine care maintains coverage and extends the product’s life.

Value goes beyond the initial cost, including water conservation and reduced risk. A well-chosen Lock For Water Faucet supports water stewardship during droughts and shows that the property is secured. These non-monetary benefits—such as peace of mind, reduced anxiety about unauthorized use, and compliance with local regulations—add significant value.

The decision should balance Hose Lock Price, expected savings from avoided water loss, and the long-term benefits of a Locking Hose Bib. A thoughtful purchase balances budget, Warranty For Faucet Lock terms, and the level of protection needed from a Flow Lock or similar device.

Water Hose Locks Summary

Installing the right Water Hose Locks is a simple way to secure outdoor water access, reduce theft, and prevent costly water waste or property damage. Whether you choose a basic Lock For Hose cap, a lever-handle lock, or a heavy-duty Lockable Water Spigot enclosure, the right fit guards fixtures and supports broader water conservation goals in your neighborhood.

Before selecting a solution, check your faucet style, local risk level, and climate. For everyday use, a well-fitted Garden Hose Lock Box or keyed bibb cap provides effective deterrence. For high-risk locations, consider a strong 12-gauge stainless enclosure such as the AA-HB-100 for maximum durability and protection.

Take the next practical step by sourcing locks and accessories from reputable suppliers. Review product specification sheets and warranties, and follow manufacturer guidelines for installation and seasonal upkeep. Understanding How To Lock Outdoor Water Faucet properly and maintaining the hardware will protect service life and preserve performance.

A modest investment in a lock system can pay back through lower utility bills, fewer repair surprises, and better compliance during drought restrictions. Secure fixtures with the right tools and routine care to keep outdoor water accessible only to authorized users and give property owners lasting peace of mind.

Categories
Plumbing

Upgrading Your Air Compressor to an L6 20 Plug System

Twist lock plugs are essential for protecting power connections where jobsite safety is a primary concern. Because they lock into a matching receptacle with a short twist, they help reduce loose or unstable connections. That locking action makes them a common choice for generators, stage equipment, and industrial machinery where an accidental unplug can create equipment problems.


Reputable makers including Eaton provide twist-lock components with NEMA markings and UL-style safety listings such as UL 498. A Nema Chart Twist Lock reference helps users compare voltage, amperage, blade layout, and whether the device belongs to a locking or non-locking family. That distinction matters because using the wrong adapter, plug, or receptacle can create shock hazards.

This guide is designed to help you in understanding Nema Chart Twist Lock charts, focusing on widely used types like L5, L6, and L14 families. Subsequent sections will break down the L6-20 and an L6-20 Plug Wiring Diagram. This information will help you to plan code-conscious installations with greater certainty.

  • Twist lock plugs feature a turn-and-secure action for secure connections.
  • NEMA twist lock charts identify voltage and amperage for safe selection.
  • Trust established manufacturers like Legrand, Eaton, and Kellems and verify UL listings.
  • Avoid unrated adapters; use compatible locking plugs and receptacles.
  • Section topics include L6-20 details and an L6-20 Plug Wiring Diagram.

Nema Chart Twist Lock

Understanding Twist Lock Plugs And Their Safety Role

A twist-lock plug uses curved blades that rotate into a compatible grooved receptacle, creating a more secure connection than a straight-blade plug. Brands such as Hubbell and Leviton use Turnlok-style designs to create a positive mechanical lock. It creates a firm mechanical hold, resisting disconnection from vibration or movement.

The locking mechanism uses a short twist after insertion. This action seats the blades into matching grooves, supporting consistent conductivity. By reducing partial withdrawal and loose fit, the design helps limit arcing, exposed conductors, and intermittent power problems.

You will often see these locking connectors in construction environments, factories, HVAC equipment areas, and data centers. They also appear in portable generator setups, stage production rigs, medical equipment, and refrigeration systems. These environments often face movement, movement, or critical loads, demanding secure power retention.

Electricians often select locking devices when equipment failure, accidental disconnection, or downtime would create serious problems. The Nema Chart Twist Lock and the L6-20 Plug Wiring Diagram guide the correct matching of plugs and receptacles. They ensure compliance with voltage, amperage, and grounding arrangements.

The safety benefits of twist-lock connectors are clear. By staying locked in place, they lower the risk of accidental unplugging, arcing, exposed contacts, shock, and fire hazards. Choosing NEMA-stamped, UL-listed components and following the L6-20 Plug Wiring Diagram also supports safer, code-conscious installations.

Design Feature Safety Value Common Use
Curved locking-blade design Helps stop accidental disconnection under movement Temporary power, production gear, HVAC systems
Ground-first engagement Helps establish grounding before energized contacts connect Critical equipment and data centers
Rated NEMA/UL identification Confirms correct voltage, amperage, and safety standards Factories, shops, and commercial sites
Plug-and-receptacle charts Simplifies correct plug-to-receptacle selection Maintenance crews and installers

NEMA Configurations Overview And How To Read A NEMA Chart

Understanding NEMA configurations is important for technicians and electricians to ensure safe connections. A Nema Chart Twist Lock section identifies the voltage class, current rating, blade arrangement, and locking style. This information is essential to reduce mismatches that could damage devices or pose safety risks.

NEMA Naming Conventions And Codes

NEMA naming conventions are a combination of a pattern number, a dash, and an ampacity. For instance, 5-15 signifies a 125V pattern with 15 amps. When the letter L appears at the front, as in L5-20P, it indicates a locking device. Letters P and R identify plug and receptacle, respectively. The charts also list common voltage classes: 125V, 250V, 277V, 125/250V, and 480V.

Locking Versus Non-Locking Sections In NEMA Charts

Charts separate between locking and non-locking connectors. Examples of non-locking devices include 5-15, 6-20, and 14-30 or 14-50 configurations. Locking families such as L5, L6, and L14 are marked with an L prefix and are commonly chosen for outdoor, industrial, or vibration-prone locations. Non-locking options are frequently used in residential and light commercial settings.

Useful Tips For Reading NEMA Charts

  • Confirm P-to-R compatibility before plugging in any device.
  • Match voltage and ampacity exactly; a L6 20 Plug must pair with the correct receptacle rated for the same voltage and amps.
  • Check pin count and configuration: 3-wire versus 4-wire and whether two hot conductors or hot/neutral/ground are used.
  • Use blade design and orientation indicators on the chart to stop cross-connection between incompatible voltage or amperage devices.

Common NEMA Twist Lock Types And Where They Are Used

In areas where cords are moved, bumped, or exposed to vibration, twist lock connectors help keep power connected. A Nema Chart Twist Lock reference quickly shows connector families, voltage ratings, amperage ratings, and practical uses. This chart assists in selecting the appropriate connector for a task, ensuring no mismating that could lead to equipment downtime.

Below, we outline typical families, their ratings, and ideal uses. The L5 series is made for 125V circuits, ensuring secure connections for 15A and 20A services. L5-15 and L5-20 are commonly specified in stage lighting and portable power distribution, where cords must remain connected despite stress.

L6 connectors are commonly associated with 250V single-phase power for equipment such as motors, compressors, and HVAC units. The L6-20 and L6-30 models are robust choices for industrial machinery and refrigerated equipment, requiring higher voltages. Their locking mechanism minimizes the risk of unplugging under heavy loads.

L14 connectors are four-wire 125/250V devices commonly associated with generators, transfer switches, and temporary power. With two hots, a neutral, and a ground, L14-20 and L14-30 connectors are practical for generator outputs, transfer panels, and jobsite power.

Some higher-amperage locking receptacles, including L530R and L630R styles, use distinct configurations so incompatible voltages are not easily mixed. When 30A power is required, selecting the correct connector helps maintain safe operation and reduces the risk of misconnection.

Twist-lock applications can include stage production, construction sites, facility maintenance, generator hookups, and industrial equipment. For portable lighting, consider L5-15 or L5-20. For motors, review L6-20 and L6-30. For generator transfer setups, L14-20 or L14-30 is recommended. When a 30A four-wire feed is necessary, L530R or L630R is the best choice to avoid mismating.

NEMA Device Rated Voltage Amp Rating Typical Uses
L5-15 locking device 125V 15-amp rating Stage lighting, portable devices, low-power tools
L5-20 locking device 125V class 20-amp rating Portable power systems and vibration-prone equipment
L6-20 connector 250-volt 20-amp rating 250V equipment, compressors, machinery
L6-30 locking device 250V 30-amp rating Larger HVAC loads, shop tools, industrial equipment
L14-20 connector 125/250V 20 amps Generator cords, small transfer panels, temporary power
L14-30 125/250V 30 amps Generator outputs, larger transfer panels, RV shore power
L530R locking receptacle 125V 30A 125V 30A circuits requiring correct locking configuration
L630R receptacle 250V class 30A 250V 30A circuits where mismating must be avoided

Understanding L6-20 Plug Wiring And Connector Basics

The L6-20 locking connector is a 250-volt, 20-amp option used in industrial and HVAC settings. The standard layout uses two hot conductors plus an equipment grounding conductor. The blade configuration is intentionally different from 125V devices, helping prevent wrong connections when the Nema Chart Twist Lock is followed.

L6-20 plug and receptacle characteristics

The L6 20 Plug uses a space-saving, twist-lock design with two hot blades and a single pin for ground. Common construction includes brass contacts and molded thermoset or industrial-grade housings from brands such as Leviton or Hubbell. Always compare the P and R designations on a Nema Chart Twist Lock so the plug and receptacle are correctly paired.

Recommended L6-20 wiring methods

Select the correct conductor size for a 20A circuit, commonly 12 AWG copper, or follow NEC sizing for specific run length and temperature. Securely tighten terminals to the manufacturer’s recommended torque and use cord grips or strain reliefs to prevent conductor pull-out.

Confirm grounding continuity and polarity before energizing equipment. Use a calibrated multimeter and a continuity tester to verify hot-to-hot and ground connections. Label the circuit and include voltage and amperage data near the receptacle for clear identification.

Example notes for an L6-20 Plug Wiring Diagram

When preparing a wiring diagram, show the two hot conductors as opposite-phase lines and the ground as a separate protective conductor. Omit a neutral conductor for the standard L6-20 arrangement. The diagram should also include terminal labels, conductor colors where applicable, and torque values for installers.

Item Rated Specification Installation Guidance
Rated voltage 250V Check both the nameplate and NEMA chart before installation
Current Rating 20-amp service Confirm conductor size using NEC requirements
Conductors Two hots, one ground No neutral in typical L6-20 wiring
Common uses Industrial motors, HVAC, compressors Check the equipment requirements before connecting
Component materials Conductive contacts with durable housing Use listed parts from recognized manufacturers
Installation checks Continuity, polarity, torque Verify before energizing and record the test outcome

Detailed Look At L6 20 Plug, L6-20 Receptacle, And L6-20R Wiring

Understanding the components and steps involved in a safe connection is key to avoiding failures on job sites. This section explains the anatomy of each part, outlines the installation process for an L6-20R receptacle, and highlights essential inspection and testing points. For best results, use NEMA-stamped and UL-listed products from reliable manufacturers such as Legrand, Eaton, and Kellems.

Component Anatomy And Materials

Housings are available in impact-resistant plastic and metal, ensuring durability in harsh environments. Curved blades and strong contacts help maintain firm engagement while reducing wear. Cord grips and strain relief reduce stress on internal terminations and help prevent conductor pullout.

Many contacts use nickel, silver, or similar plating to reduce resistance and improve durability. Various styles, including weather-resistant, flush-mount, and surface-mount, cater to different installation needs. Brands like Legrand and Eaton provide detailed specifications and UL listings for each model.

Installing And Wiring An L6-20R Receptacle

Before beginning any wiring task, shut off power at the breaker and verify the circuit is de-energized. The box should be mounted securely with hardware suited to the wall, equipment, or enclosure surface. Use an enclosure rated for the installation location, especially in wet, dusty, or industrial areas.

Strip conductors to the recommended length specified by the manufacturer. Tighten terminals to the torque value provided in the product literature. Proper cord grips and cable clamps should be used so pulling force is not transferred to the terminals.

After installation, label the circuit and confirm that the breaker rating matches the L6 20 Plug, receptacle, and branch-circuit ampacity. For permanent installations or higher-power work, follow the NEC and use a licensed electrician where required.

Testing And Inspection After L6-20 Installation

Before energizing, check conductor continuity and verify the hot conductors and grounding path with a multimeter. Perform insulation resistance testing when available to confirm no shorts or moisture paths exist.

Verify grounding by measuring resistance to a known good ground. Confirm blade engagement by inserting a matching L6 20 Plug and observing a snug, locking fit.

Follow UL and manufacturer torque specs during rechecks. If a device fails testing, shows heat damage, or has damaged terminals, replace it rather than attempting unsafe field repair.

Item Suggested Practice Purpose
L6-20 wiring diagram Use the manufacturer diagram and identify conductors as hot-hot-ground Prevents miswiring and ensures correct phase relationship for 250V circuits
Receptacle mounting method Use rated enclosures, screws, and weather seals as required Improves durability and reduces mechanical failure
L6-20R inspection checks Verify conductor placement, ground continuity, and insulation integrity Confirms safe operation and compliance with NEC and UL guidance
Terminal connections Follow torque specs and terminate stranded wire properly Reduces heat buildup and prevents loosening over time
Device selection Choose UL-listed parts from Legrand, Eaton, or Kellems Reduces the risk of counterfeit or under-rated components

Safety Warnings And Common Twist Lock Installation Errors

Many twist-lock failures start with simple mistakes such as wrong ratings, poor termination, or mismatched devices. It’s vital to read wiring codes and match NEMA markings. A correct Nema Chart Twist Lock reading prevents plug and receptacle mismatches, which can cause shock or overheating. If unsure, always consult a licensed electrician before proceeding.

Why Twist Lock Adapters Are Discouraged

Twist lock adapters can appear useful but often fail to fully seat or lock. A loose or incomplete connection can increase resistance, create heat, and lead to damaged contacts.

Many twist lock adapters may be missing UL listing or are underspecified for the advertised amperage. Reputable manufacturers like Hubbell and Legrand rarely offer field adapters for locking devices. Using an unlisted adapter significantly increases the risk of melting and fire.

Frequent Wiring And Selection Errors

Two of the most common mistakes are mismatching voltage and amperage ratings. A 20A load connected to a 15A circuit can overload wiring, devices, or breakers if not correctly protected.

Incorrect conductor size and loose terminal screws are also common causes of failure. A poor termination or a backstabbed conductor creates a hot spot that can char insulation.

Another common mistake is ignoring the P and R markings that identify plugs and receptacles. Mixing NEMA families, modifying blades, or ignoring the Nema Chart Twist Lock can create dangerous and non-compliant setups.

Regulatory And Professional Guidance

The National Electrical Code applies to branch circuits, receptacle ratings, cord sets, and related installation rules. Use the NEC sections that apply to receptacles, cord-connected equipment, grounding, and overcurrent protection. Select UL-listed components and NEMA-stamped devices so ratings and configurations can be verified.

For L6-20R Wiring or other locking receptacle installations, a licensed electrician should complete or inspect the work. A permit and inspection may be required by local authorities having jurisdiction.

Safety warnings: do not use improvised adapters, do not exceed the listed amperage, and always confirm torque, grounding, and continuity before energizing.

How To Choose Twist Lock Products And Where To Buy Them

To choose the correct twist-lock product, first match the NEMA code to the equipment voltage, amp rating, and conductor count. It’s important to consider if the installation is indoors or outdoors. Weather resistance, corrosion resistance, and vibration performance should be part of the selection process. Also, check the cord length, strain relief, and terminal materials before making a purchase.

Checklist For Choosing Twist Lock Devices

Here’s a quick checklist to help narrow down your options. Confirm that the NEMA marking, UL listing, and equipment requirement all match. For equipment needing a 240V or 250V, 20A locking connection, compare the device against an L6-20 Plug Wiring Diagram. If the location is wet or salty, inspect materials for corrosion resistance.

  • Confirm NEMA code and configuration against a Nema Chart Twist Lock.
  • Verify voltage, amperage, and wire count compatibility.
  • Choose weatherproof or indoor-rated housings as needed.
  • Check strain relief, cord rating, and terminal material.
  • Cross-check with an L6-20 Plug Wiring Diagram when selecting L6 20 Plug and L6-20 Receptacle parts.

Trusted Brands And Certifications

For dependable components, choose established manufacturers such as Legrand, Eaton, and Hubbell. Look for UL listings and clear NEMA stamping on the device. Authentic, listed products are easier to verify and generally support inspections better than unbranded or unverified alternatives.

Supplier Brand Typical Strength Typical Certifications
Legrand devices Many device options with durable construction UL listing and NEMA markings
Eaton electrical Heavy-duty connectors, industrial focus UL listing and CSA where applicable
Hubbell connectors Rugged devices and weather-resistant options Listed devices with marked configurations

Where To Buy Twist Lock Products

Buy from authorized electrical distributors and verified online suppliers to ensure authenticity. Installation Parts Supply can provide connector options along with useful product details for comparison. Before purchasing, compare the product listing against manufacturer catalogs, NEMA charts, and equipment nameplate data.

  1. Compare product specs to a Nema Chart Twist Lock entry.
  2. Confirm UL listing and manufacturer warranty.
  3. Purchase from an authorized dealer or known distributor.

Final Thoughts

When planning or verifying installations, use the Nema Chart Twist Lock as your guide. Ensure that an L6 20 Plug only connects to its correct receptacle by matching the exact NEMA locking configuration. Before energizing equipment, confirm voltage, amperage, conductor count, and blade layout against official chart data.

For L6-20 installations, follow a detailed L6-20 Plug Wiring Diagram and use proper L6-20R Wiring methods. Locking connectors are valuable in industrial and commercial settings, preventing accidental disconnections. They are especially useful where vibration, movement, or frequent use is expected. Never use jury-rigged adapters or uncertified parts, as they compromise safety.

Opt for UL-listed, NEMA-stamped devices from trusted suppliers and authorized distributors for consistent performance. For permanent or high-power installations, hire a licensed electrician and follow the National Electrical Code. Proper planning, correct parts, and professional installation ensure systems are safe and reliable.

Categories
Plumbing

3/4 Union Brass for Hydronic Heating

For copper pipe connections, compression fittings give a dependable way to couple tubing without using solder or using torch heat. A Copper Compression Union employs a nut, ferrule, and body to create a secure seal when the nut is tightened with a wrench. Because of that effective design, the Compression Fitting 3/4 and 3/4 Copper Compression Fitting are commonly preferred by trade installers and DIY enthusiasts.

These unions are practical for home and commercial projects, including supply piping and instrumentation runs. Installation Parts Supply frequently carries 3/4 Compression Fitting Copper and 3 4 Compression Fittings in various materials like brass, copper, and stainless. As the nut tightens, the ferrule compresses between the tapered body and nut, gripping tubing such as annealed copper or compatible thermoplastic tube.

Important Takeaways

  • Copper Compression Union couples copper pipe without soldering.
  • Compression Fitting 3/4 and 3/4 Copper Compression Fitting are widely used sizes.
  • 3/4 Compression Fitting Copper and 3 4 Compression Fittings are commonly stocked through Installation Parts Supply.
  • Brass bodies and ferrules add durability, strength, and corrosion resistance.
  • Wrench-tightening the nut seats the ferrule to form a leak-tight seal.

Understanding Copper Compression Union Design And Components

The Copper Compression Union is a three-piece design that joins tubing without soldering. It is frequently chosen in plumbing, HVAC, refrigeration, gas distribution, and instrumentation. This is because it provides a tight, compressive seal. The 3 4 Copper Compression Union is commonly used in residential and light commercial settings.

Copper Compression Union Uses And Basics

A compression union joins two pipes by compressing a ring around the tube as the nut tightens. It is useful for quick repairs, service loops, and tight spaces where an open flame is impractical. A 3/4 Copper Compression Fitting is well suited for mains, branch lines, and appliance feeds where brazing is not desired.

Body, Ferrule Olive, And Nut Components

The union body provides the threaded channel that accepts the nut. The ferrule, often called an olive, compresses and seals against the pipe and body when the nut is drawn up. The nut tightens against the body and provides the compression force. Proper seating of the ferrule is critical for a leak-free joint and for serviceability in the field.

3/4 Compression Fitting Copper

Copper Union Materials: Copper, Brass, Stainless Steel, And Plastics

Brass unions are ductile and corrosion-resistant, which makes them a common match for copper pipe in water and gas systems. Stainless steel provides additional strength for high-pressure, high-temperature, or demanding service. Copper-to-copper unions offer similar thermal expansion and fit common tubing sizes. Plastic ferrules and fittings, such as acetal or nylon, are installed in low-pressure domestic systems where nonmetallic connections or chemical resistance are useful.

Why Matching Copper Unions Lower Galvanic Corrosion Risk

When metals match, galvanic corrosion risk is reduced because similar alloys share electrochemical properties. A copper-to-copper union, or a brass body paired with copper pipe, limits active corrosion at the connection. Avoid pairing copper with carbon steel or dissimilar metals without dielectric breaks when using a 3/4 Compression Fitting Copper to ensure long-term durability.

Benefits Of Compression Fittings For Copper Pipes

For copper pipe work, compression fittings provide a fast, safe alternative to soldered joints. They remove the need for an open flame, reducing fire risks near insulation, drywall, or aging structures. A Compression Fitting 3/4 can create a dependable seal without heat, making it ideal for retrofits and tight locations.

Installation is straightforward and consistent across most brands. First fit the nut onto the tube, then add the ferrule. Next, insert the tube fully into the body and hand-tighten before applying the final wrench turns. A 3/4 Compression Fitting or 3 4 Compression Fitting can be installed quickly in crawl spaces, behind cabinets, or other tight areas where torch work is not practical.

Serviceability is a major strength of compression unions. Many tradespeople choose 3 4 Compression Fittings because assemblies can be loosened or repositioned without cutting pipe. Ferrules may need replacement after disassembly, yet the overall joint often remains reusable, saving time during repairs and modifications.

Compression fittings can be used in many systems beyond ordinary household plumbing. They appear in gas distribution, HVAC refrigeration lines, and instrumentation systems where leak integrity and maintenance access matter. When a compact, no-flame connection is needed, a Compression Fitting 3/4 or 3/4 Compression Fitting can be a practical choice.

Feature Compression Joint Solder Joint
Flame requirement No open flame Torch or heat needed
Install speed Fast More time required
Serviceability Can often be loosened Not serviceable without cutting
Confined-space suitability High Often difficult
Usual applications Repairs, gas, HVAC, and serviceable lines Permanent water runs and sealed joints

Choosing Size And Material For Reliable Compression Connections

A reliable plumbing joint requires the correct size and material selection. Before buying, confirm both the pipe outside diameter and the fitting designation. Misreading terms such as 3/4 Compression Fitting can result in leaks, poor fit, and expensive repairs.

When selecting fittings, it is important to understand the difference between nominal size and outside diameter OD. Search for SKU labels such as 3 4 Copper Compression Union or 3/4 Copper Compression Fitting. Correct sizing allows proper ferrule seating on the copper tube.

Useful SKU keywords for buying

Retail pages and manufacturer catalogs may list the same fitting under several names. Look for clear labeling and adherence to standards. Common search terms include Compression Fitting 3/4 and 3 4 Copper Compression Union. Make sure the product description matches your pipe OD or nominal sizing requirement.

Material choices

Brass is the preferred material for copper pipe systems due to its ductility and corrosion resistance. A 3/4 Union Brass or a 3 4 Union Brass suits the needs of most residential and light-commercial applications.

Copper unions are effective when matching metals, controlling thermal expansion, and reducing galvanic activity. A 3/4 Compression Fitting Copper provides a homogeneous connection suitable for refrigeration and traditional plumbing.

Stainless steel is often recommended where higher pressure, heat, or aggressive chemicals are involved. It provides greater strength and chemical resistance compared to brass and copper.

Acceptable uses for plastic fittings

Acetal or nylon compression fittings may be suitable for low-pressure domestic water lines or situations where non-conductivity is needed. However, they have drawbacks, including lower pressure ratings, lower temperature tolerance, and sensitivity to some chemicals.

Comparing common coupling types

Material Typical Use Durability Notes
3/4 Union Brass in brass Water lines, gas service, and general plumbing Reliable Cost-effective, compatible with copper
3/4 Compression Fitting Copper Refrigeration, plumbing, and same-metal joints Moderate Reduces galvanic risk and matches copper tube
Stainless steel High pressure, high temp, corrosive fluids Strong Useful where strength and chemical resistance matter
Acetal or nylon plastic Low-pressure household water lines Low to Moderate Non-conductive, limited temp/chem resistance

Sizing advice

When encountering product names like 3 4 Brass Compression Coupling or 3/4 Inch Compression Fitting, confirm the listing’s reference to OD or nominal pipe size. Verify compatibility against manufacturer specifications and, where relevant, approvals from trusted brands such as Dixon.

Best Installation Practices For A Leak-Free Union

Begin with clean, straight copper tubing. Use a pipe cutter to make a clean cut. Remove any burrs with a deburring tool or fine sandpaper. A smooth, square end is critical to prevent ferrule damage and ensure a reliable seal when installing 3/4 Compression Fittings.

Assemble components in the correct order. Place the compression nut on the pipe with threads facing outward, followed by the ferrule. Push the pipe fully into the union body until it bottoms out. This step helps prevent gaps that can cause leaks when using a 3 4 Brass Compression Coupling or 3/4 Compression Fitting Copper.

First, hand-tighten the nut so the parts align properly. Then, use two wrenches: one to hold the fitting body steady, the other to turn the nut. Follow the manufacturer’s recommended number of wrench turns after finger-tight. Over-tightening can crush the ferrule or crush the copper, reducing the life of a 3/4 Copper Compression Fitting.

Avoid reusing ferrules. Use a new ferrule and nut for each new compression joint. Avoid installing compression joints in areas exposed to constant vibration or repeated movement. These conditions can loosen fittings such as 3/4 Compression Fittings and 3 4 Brass Compression Coupling over time.

Check the pressure and temperature rating for the fitting you choose. Before installation, review the product datasheet or packaging. After assembly, restore pressure slowly and inspect the joint for leaks. If slight weeping appears, tighten the nut in small increments. If the leak continues, disassemble the joint and inspect the ferrule, nut, and pipe end to verify correct seating.

Compression Union Maintenance, Replacement, And Troubleshooting

Begin by shutting off the water supply and relieving pressure. Use two wrenches, one to hold the fitting body steady and the other to turn the compression nut counter-clockwise. Apply penetrating oil to a seized nut and let it soak before attempting removal.

Removing an existing compression union safely

Hold the pipe steady with one wrench and turn the nut with another. After the nut loosens, slide the nut and ferrule away from the tube end. If the union is old, back off slowly to avoid sudden leaks or pipe damage.

When to replace the ferrule and nut versus the entire union

Replace only the ferrule and nut when the fitting body is still sound but the sleeve shows wear, distortion, or scoring. Replace the entire unit if the body threads are corroded, the fitting leaks after new ferrules are fitted, or the assembly no longer meets pressure or material ratings.

Common failure signs: weeping, corrosion, or ferrule damage

Look for weeping at the nut-ferrule interface, green or white corrosion on brass or copper, and crushed or split ferrules. Vibration may gradually loosen compression unions and cause slow leaks over time.

Tips to cut out a stuck ferrule without damaging the copper pipe

Score the ferrule lengthwise with a thin rotary blade or hacksaw, then pry it open and peel it off. If available, use a ferrule puller for cleaner removal. If the tube is nicked, flattened, or damaged, cut the end square again, deburr it, smooth it, and reinstall with a new ferrule and nut.

Longevity comparison: compression unions and soldered joints

Under static conditions, soldered joints usually provide a more permanent seal and may last longer. Compression unions are easier to service and require no flame, making them useful for repairs and confined spaces. Where vibration or long-term mechanical stress is present, soldered joints often outperform compression fittings.

Item Ease Of Service Typical Service Range Ideal Application
Brass 3 4 Compression Union Can be disassembled; ferrule may need replacement after several cycles 5–15 years depending on conditions Tight repairs and no-flame installation areas
Brass 3/4 Union Moderate; replace nut and ferrule if body is intact Often 5–15 years under normal use Plumbing runs that may need future service
3/4 Compression Fitting Reusable short term; ferrule replacement recommended after repeated cycles Material-dependent, commonly 7–20 years for brass Quick repairs and installations without solder
3/4 Inch Compression Fitting Easy to install and remove; watch for damage when reusing ferrules Environment-dependent and shorter with vibration Residential service work and confined installations
3/4 Compression Fittings soldered comparison Soldered joints are permanent and not easily serviced Frequently 20+ years if installed correctly Long-term fixed runs and vibration-prone systems

When sourcing spares, check manufacturers such as Mueller, Nibco, or Watts for compatible 3/4 Compression Fittings and 3/4 Inch Compression Fitting parts. Always verify material compatibility and pressure ratings before reinstalling any replacement ferrule or nut.

Conclusion

Copper compression unions deliver a practical solution for joining copper tubing without the need for soldering. The union’s body, ferrule, and nut create a tight seal when properly sized and installed. That makes them useful where heat is impractical or where future serviceability matters.

When choosing materials, match the fitting to the application: brass or copper for potable systems and lower galvanic risk, stainless steel for harsh or high-stress service, and approved plastics where they are permitted. A 3/4 Compression Fitting or 3/4 Copper Compression Fitting can perform well when the pipe is cut square, the ferrule is seated properly, and tightening follows manufacturer guidance.

Maintenance is manageable: check for signs of weepage or corrosion, replace ferrules as needed, and avoid over-tightening to prolong the union’s life. For parts such as a 3 4 Copper Compression Union or 3 4 Union Brass, confirm availability and specifications through Installation Parts Supply. This supports compatibility and correct installation instructions.

Categories
Plumbing

The History of Innovation and Reliability Behind the Watts Regulator Brand

A pressure reducing valve (PRV) is a straightforward device that prevents excessive municipal pressure from damaging home plumbing. Some municipal mains deliver water above 100 psi, and certain systems can even exceed 200 psi. Most plumbing codes call for a PRV when incoming pressure tops about 80 psi. For many homes, a 50–70 psi target supports plumbing protection with comfortable showers, reliable fixtures, and smooth irrigation performance.


Watts has supplied water control products for more than a century, and its Watts Water Regulator models cover common residential needs. Watts WPRVs use a spring-loaded diaphragm and seat assembly to drop and stabilize incoming pressure. Standard residential models, such as LF25AUB and LFN55B, fit 1/2″–2″ lines with adjustable ranges usually between 25 and 75 psi.

Installing a Watts Water Pressure Regulator just after the water meter is the usual practice. Correct sizing and placement help minimize noise, prevent early valve wear, and maintain stable performance. Many Watts regulators offer features like built-in strainers, gauge ports, and thermal-expansion bypass options for modern plumbing requirements.

Homeowners can confirm regulated pressure with a simple gauge at an exterior hose bib. When pressure drifts or the regulator cannot hold its setpoint, a licensed plumber should check the diaphragm, seat, fittings, and related parts. Installation Parts Supply stocks common Watts Regulator models and accessories for residential pressure regulator projects.

  • A PRV helps protect home plumbing from high municipal pressure and is commonly required when supply pressure exceeds about 80 psi.
  • Watts Water Pressure Regulator models use a spring-loaded diaphragm to stabilize pressure.
  • A common home pressure target is 50–70 psi because it balances fixture performance with pipe and appliance protection.
  • Install the regulator just after the meter and size it using manufacturer flow tables.
  • Check pressure with a hose-bib gauge; Installation Parts Supply carries common Watts parts.

Watts Water Regulator

Why Install A Pressure Regulator: Benefits For Homeowners And Savings

Municipal main pressure can sometimes climb beyond 200 psi, which can put serious strain on residential plumbing. A correctly adjusted pressure regulator lowers that incoming pressure to a safer, more manageable range. That helps protect pipes, fixtures, valves, and appliances while keeping flow steadier during supply-pressure changes. Many codes require a pressure reducing valve for mains over 80 psi, making a Watts Water Pressure Regulator a common solution.

How Regulators Protect Pipes, Fixtures, And Appliances

Excess pressure can cause pinhole leaks, cracked fittings, and early failure of appliances such as washing machines and water heaters. A Watts Water Regulator installed at the building inlet helps reduce damaging pressure spikes before they reach the home. This creates stable downstream pressure, reducing the chance of burst pipes and limiting stress on valves and fixture cartridges.

Savings On Water, Energy, And Wastewater

Flow increases sharply with pressure; roughly twice the water can flow at 150 psi compared with 50 psi. Lowering supply pressure can reduce household water use and cut the energy needed to heat domestic hot water. Watts literature shows that a pressure reducing valve can trim hot-water energy use in many homes, helping reduce water waste and utility bills.

Many municipal sewer charges are tied to metered water volume. Reducing consumption with a residential PRV can benefit owners by lowering wastewater charges. For compatible parts, Installation Parts Supply carries Watts regulators and accessories that can support code compliance and water-efficiency goals.

Improving Comfort While Extending Plumbing Life

Target pressures between 60 and 70 psi provide steady shower performance without banging or humming. A stable regulated system improves appliance operation and extends the life of water heaters and valves. Adding thermal expansion controls when needed prevents T&P valve nuisance discharge, keeping the system quieter and more reliable.

Monthly pressure checks at an easy-to-reach hose bib can confirm settings and reveal pressure changes early. Homeowners who pair a quality Watts Water Pressure Regulator with proper accessories gain the main residential PRV benefits of protection, savings, and long-term reliability.

Watts Water Pressure Regulator Overview

Watts provides a wide range of pressure regulators for homes and light commercial settings. These regulators range from compact direct-acting types to larger pilot-operated valves. Homeowners can choose suitable options based on pipe size, flow requirements, and installation limits. These regulators are known for dependable performance and recognized certifications.

Common WPRV Models And Product Families

For typical residential systems, models like LF25AUB and LFU5B are commonly used on 1/2″ to 2″ service lines. They offer adjustable ranges near 25–75 psi. Larger capacity lines, such as LF223 and LF115, serve higher flow demands and pressures. Specialty series, including SS263AP and P60, meet stainless and food-grade requirements.

Installation Parts Supply carries common Watts lines with multiple end-connection options. These include threaded, solder, PEX, CPVC, press, and quick-connect fittings. This variety helps ensure compatibility with different installation scenarios.

Manufacturers supply flow-capacity tables and performance curves to help select the correct regulator. The chosen model should satisfy both expected flow demand and the desired downstream pressure range. This ensures enough margin for peak demand.

Common Features And Regulatory Approvals

Many Watts Regulator models include integral strainers, EZ-set adjustments, gauge ports, and easy-access covers. These features help make inspection, adjustment, and maintenance more convenient. Lead-free wetted components help comply with current regulatory limits for potable systems.

Certifications such as NSF 61-G/372 and ASSE 1003 are common on many models. These certifications provide assurance for domestic installations. Options such as stainless construction and FDA-approved materials serve specialized applications.

Installation Parts Supply usually provides model details so buyers can verify approvals, sizes, and end connections before purchase. Confirming these details ahead of time can reduce ordering mistakes and installation delays.

How The Valve Works: Direct-Acting Versus Pilot-Operated

Direct-acting regulators control flow with a spring-loaded diaphragm working against a valve seat. They are quick to respond and are well suited to normal single-family residential demand. The LF25AUB is a common example, providing stable control for single-family systems.

Pilot-operated designs separate sensing and main valve stages. The pilot monitors downstream pressure and controls the main valve to maintain stability during higher flow demand. Models like LF223 and LF115 are useful on larger mains and commercial systems where stable setpoints and minimal drift matter.

For accurate downstream pressure control, install the regulator near the meter or main shutoff. Easy-to-access gauge ports make setup, testing, adjustment, and service much simpler.

How To Size, Select, And Install A Regulator For Reliable Home Use

Selecting the proper regulator starts with realistic demand estimates and a clear installation plan. Use manufacturer curves and tables to match valve flow rates to system needs. It is best to operate the regulator near the middle of its rated range to avoid hunting or noisy operation. For high inlet pressures or large reduction ratios, staged approaches can extend valve life and improve control.

How To Correctly Size A Regulator

Begin by estimating peak flow from fixtures, appliances, and irrigation zones. Then compare that demand with Watts Water Pressure Regulator capacity data at typical selection points, such as the 20 psi fall-off shown in manufacturer tables. As a rule of thumb, minimum flow through the valve should generally be about 10–15% of the maximum intended flow.

Avoid oversized valves to prevent wire drawing and noise. Undersized valves can starve downstream demand. For varying flows, select a valve that covers expected pressures and flows without running at the extreme ends of its curve.

Recommended Installation Configurations

Place the regulator just after the meter or main shutoff, and include isolation valves plus unions for easier service. For inlet pressures over 150–200 psi, or when the required reduction ratio is near 3:1, use two-stage reduction in series to share the drop.

For continuous service, redundancy, or widely varying peak flows, two regulators installed in parallel can work well. Set one valve roughly 10 psi higher than the other. Watts suggests placing the lower-set valve in the main run and the higher-set valve on the saddle for easier maintenance and better capacity alignment with peak demand.

Practical Installation Tips And Required Accessories

Choose end connections that match local piping, including PEX, CPVC, press, sweat, or flanged options to reduce labor and meet code. Include unions, isolation shutoffs, and tailpiece kits so the Watts Water Regulator can be serviced or removed without cutting the line. Install a gauge on the downstream side so the setpoint and performance can be verified.

When a check valve or backflow preventer creates a closed system, consider a regulator with thermal expansion bypass and use a dedicated expansion tank for proper control. For larger sizes and automatic control, LR115-style and other automatic control valves sized 1 1/4″–16″ can be staged in parallel or series for greater capacity and redundancy.

System Need Best Practice Why it matters
Pressure selection Choose regulator by gpm using Watts tables at 20 psi fall-off Ensures valve operates near mid-range for stability
High inlet pressure Install two regulators in series when inlet pressure is about 150–200 psi or higher Reduces wear and improves control accuracy
Changing demand peaks Install parallel valves with staggered setpoints Supports redundancy and better peak-flow handling
Repair access Include unions, shutoffs, gauges, repair kits Speeds maintenance and reduces system downtime
Thermal expansion Use regulators with bypass plus a dedicated expansion tank Prevents T&P relief valve nuisance discharges
Parts supply Order Watts regulators, repair kits and accessories Installation Parts Supply carries parts for complete regulator installations

How To Maintain, Troubleshoot, And Replace A Regulator

Regular maintenance extends the life of a pressure regulator and prevents unexpected failures. Conduct monthly or quarterly visual inspections for leaks, drips, or corrosion. If flow seems restricted, clean or replace the built-in strainer or screen. Ensure unions and a bypass line are accessible for easier maintenance.

Verify downstream pressure with a gauge at a hose bib or water heater. Residential pressure is commonly set around 60–70 psi and should generally remain below 80 psi. Use this reading during inspections and after adjustments to confirm settings.

Routine Regulator Checks And Maintenance

Check for slow leaks, loose fittings, corrosion, mineral scale, and damp areas around the valve. Clean the strainer screen when debris is present. Apply light lubrication to external adjustment components to prevent seizing. Keep a simple log of inspection dates, pressure readings, and adjustments so pressure trends are easier to spot.

Symptoms Of A Failing Regulator And Diagnostic Checks

Warning signs include fluctuating pressure, banging pipes, humming sounds, and unstable flow. Also note pressure that remains too high or too low. If the regulator cannot hold a setting, it may have a worn seat, damaged diaphragm, debris, or internal wear. Use multiple pressure readings to distinguish supply-side issues from regulator faults.

When To Repair Or Replace A Pressure Regulator

Service life typically ranges from 10 to 15 years, depending on water quality, usage, and installation. Ongoing leaks, corrosion, pressure instability, or repeat failures usually mean replacement should be considered. Watts offers model-specific parts, and many faults can be fixed with a PRV repair kit.

When choosing repair, follow manufacturer instructions and use genuine parts from trusted sources. Installation Parts Supply offers Watts repair kits, gauges, and replacement regulators. For complex issues such as a failed diaphragm or worn seat, consult a licensed plumber for diagnosis and decision-making.

Consider upgrading to modern Watts models with features such as EZ-Set adjustment, built-in gauge ports, thermal bypass, or higher capacity when replacing a worn regulator. Correct installation, regular inspection, and prompt troubleshooting help protect downstream plumbing and extend service life.

Final Thoughts

A Watts Water Pressure Regulator plays an important role in safe and efficient residential plumbing. Models such as LF25AUB and LFN55B are common, while LF223 and P60 suit higher-demand needs. These regulators reduce high inlet pressure to safer downstream levels and help protect plumbing, fixtures, and appliances.

Choosing the right size and following installation steps are key. Regular checks are also important. Use Watts Regulator data to match the valve to your needs. A simple gauge check can confirm system pressure.

If pressure problems continue, contact a licensed plumber. Regular maintenance and genuine parts are important for lasting performance. Installation Parts Supply provides authentic Watts valves, repair kits, gauges, and accessories for U.S. residential projects.

This guide shows the value of a well-chosen Watts Water Pressure Regulator. A correctly sized and maintained regulator can reduce repair costs, water use, energy demand, and system wear. Always follow manufacturer guidelines and seek expert advice when needed.

Categories
Plumbing

Why a 4 Way Spigot Water Key is a Common Sight at Construction Sites

Ever wondered about the importance of a compact plumbing tool in allowing access to outdoor water? Its importance is often underestimated. Square-keyed sillcocks have been a staple for decades, limiting unauthorized access to outdoor faucets and utilities. The 4 Way Sillcock Key, also known as a 4 way key, is a small, handy tool. Plumbers and homeowners rely on it to open recessed spigots.

Visit website of Water Hose Key
Popular names including Husky, Knipex, Hautmec, Willbond, Cobra, and Grainger offer a range of options. Buyers often compare factors like portability, durability, and versatility. The right 4 way sillcock key should help prevent stripped spigots, handle painted or stiff valves, and fit common keyed shapes on residential and commercial fixtures.

This overview covers the functionality of a four way key, its proper use, and what to consider when purchasing a multi-functional key. It is a smart addition to your toolkit or vehicle.

What A 4 Way Sillcock Key Does And How It Works

A 4 way sillcock key is a versatile tool designed for turning recessed keyed faucets, hose bibs, and utility valves without exposed handles. It provides controlled access to water systems in different locations, including yards, parks, and service cabinets. It helps both homeowners and professionals when normal handles are missing and access must stay restricted.

Definition And Core Purpose

The main purpose of this tool is to operate valves that use keyed recesses rather than knobs. A water valve key allows authorized users to open or shut supply lines without altering the plumbing. It is highly useful for maintenance crews, landscapers, and emergency responders who need fast, secure access to outdoor water.

Typical Shapes And Sizes Included On Most Keys

Most keys feature several square sizes, matching common stems like 1/4″ (6mm), 9/32″ (7mm), 5/16″ (8mm), and 11/32″ (9mm). Premium models also include triangle bits, half-moon slots, and step-square fittings. A 4 way stem key or 4 way spigot key with these features handles most residential and light-commercial jobs.

Why Outdoor Faucets And Utilities Use Recessed Square-Keyed Access Points

Recessed square-keyed access points are chosen to reduce unauthorized use of public water. Agencies like transit, parks, and building management prefer them for limiting vandalism and waste. A key for water hose access ensures only authorized personnel can operate the outlets.

How The Key Works With Sillcock Spigots, Hydrants, And Valve Types

The tool fits into the recess and transfers torque to the internal stem or stop valve. Achieving proper engagement requires the correct bit shape and a precise fit to avoid slippage. When the faucet tool matches the valve, it can turn stuck or painted-over stems with less risk of stripping.

  • Quick Tip: Match bit size to the valve to prevent damage.
  • Quick Tip: Choose a 4 way spigot key or faucet tool that can handle the torque required on older spigots.
  • Tip: Keep a compact key that works as both a key for water hose access and a 4 way stem key for different tasks.

Silcock Four Way Key

4 Way Sillcock Key: Practical Applications For Homeowners And Professionals

A compact 4 way sillcock key saves time on routine jobs and emergency calls. Homeowners, landscapers, and service crews depend on this plumbing tool. It opens recessed spigots, provides temporary water, and manages seasonal tasks without the need for multiple wrenches.

Turning on residential outdoor faucets and hose bibs

Keep a four way water key in your car or garage kit. It comes in handy when outdoor faucet handles are frozen or missing. A bib key or hose bib key fits most recessed spigots, allowing quick access to water for cleaning, filling tanks, or testing irrigation.

Accessing commercial and public water spigots responsibly

Maintenance crews use a 4 way water key to operate keyed municipal and commercial spigots. The multi-head design limits unauthorized use. It gives authorized staff a reliable outdoor faucet key for parks, construction sites, and service yards.

How it helps with property maintenance, landscaping, and winterization

Landscapers and property managers rely on a key for water hose during irrigation startup, shutdown, and winterization. The tool makes flushing, draining, and seasonal shutdowns faster across varied spigot shapes without the need to switch tools.

Why plumbers and contractors use a multi-functional key for efficient service

Plumbers and contractors prefer a sturdy four way water key or branded heavy-duty variants. These help reduce clutter in the truck. Carrying one compact plumbing tool cuts service time when locating shutoffs, opening yard spigots, or prepping sites for repair.

Situations where a 4 way water key is especially useful

  • Emergency water access after an outage for cleanup or basic needs.
  • Opening municipal spigots for construction, street cleaning, or events.
  • Opening recessed valves in older buildings during inspection work.
  • Providing temporary supply for mobile crews and landscape teams.

Choosing The Right Tool: Materials, Models, And Key Buying Points

When selecting a water-key tool, it’s essential to match the key to the spigot types you frequently encounter. A compact, well-crafted key can save time and prevent damage during service calls or weekend yard work.

Keyed Sizes And Configurations To Cover Most Spigots

Look for keys with several square sizes like 6mm, 7mm, 8mm, and 9mm. Triangle bits typically range from 7–12mm. Half-moon plus step-square profiles are designed for legacy fittings.

Premium models often provide wider metric coverage. This means a single 4 way spigot key can accommodate uncommon stems. That flexibility reduces the need to carry separate tools for each job.

Material, Durability, And Manufacturing Quality Considerations

Choose machined or hardened tool steel because it offers strength and resists shattering under torque. Precision machining minimizes the risk of stripping valve stems.

Premium brands like Knipex twin key use tool steel and smart nesting designs. Mid-range options, such as Hautmec 4-way, provide good durability at a more budget-friendly price.

Weight, Portability, And Storage In A Vehicle Or Toolkit

Weight can vary significantly, from lightweight Willbond 4-way tools to heavier Knipex units. A heavier key often lasts longer and covers more sizes but adds bulk.

Store a robust key in your vehicle or service bag. A lighter 4 way spigot key is ideal for household toolbox use and quick outdoor tasks.

Brand And Product Examples To Consider

  • Hautmec 4-way — solid value with machined steel construction.
  • Knipex twin key — premium German-made quality with broad bit coverage.
  • Willbond 4-way — light and convenient for everyday use.
  • Husky options, including the husky 4 way sillcock key, are widely available choices that balance function and cost.

Where To Buy This Tool And Distributor Notes

Buy from specialty plumbing suppliers, online marketplaces, or a plumbing wholesale distributor for contractor-grade tools. Installation Parts Supply stocks professional sillcock keys for service departments.

Homeowners may find big-box stores the most convenient source. Search terms like home depot silcock or silcock home depot will reveal common 4 way spigot key options on retail shelves.

Safety, Legal, And Best-Practice Tips For Using A Bib Key Or Hose Faucet Key

When using a bib key, hose faucet key, or hose spigot key, use caution and common sense. Many public and commercial spigots are locked or require a key to prevent unauthorized access. Possessing a 4 way key or cross key does not grant you permission to access private or municipal water sources.

Legal considerations and responsible access

Ensure you have the proper authorization before operating a water valve key on a commercial or public outlet. Local laws or property regulations might restrict turning on spigots without consent. Use a 4 way stem key only for approved maintenance, emergency shutdown, or with explicit permission from the owner.

Preventing damage with proper fit and technique

Use the proper bit on your 4 way key so the spigot head fits snugly. A snug fit minimizes slippage and the risk of damaging square or triangular stems. Avoid forcing a stuck valve and use penetrating lubricant with steady pressure instead. Avoid makeshift tools such as pliers because they can round off edges and damage a cross key.

Maintenance and storage tips

  • Keep your water valve key dry and free of rust by wiping it after use.
  • Regularly inspect bits for wear and replace them if they show signs of rounding or cracks.
  • Store a compact 4 way key or 4 way stem key on a dedicated keychain, in your toolbox, or vehicle for quick access during tasks.

When a professional should be called

If a valve is leaking, completely seized, or if a keyed mechanism is damaged, contact a licensed plumber. A plumber will have the proper tools and replacement parts to prevent additional damage to the spigot. If the spigot belongs to a building owner or municipality, report the issue instead of attempting invasive repairs yourself.

Final Thoughts

A 4 way sillcock key is a compact, affordable plumbing tool. It unlocks recessed outdoor faucets and utility valves across various settings. This four way water key combines multiple key bits in a compact design. It is a practical tool for landscaping, maintenance, and emergency water access without heavy gear.

Choosing the right outdoor faucet key involves considering size, material, and the bit types needed for local spigots. For occasional homeowners, value-oriented brands like Hautmec, Willbond, and Husky offer useful faucet tool options. Professionals often prefer premium, durable choices such as Knipex or sourcing through distributors like Installation Parts Supply. Big-box retailers like Home Depot carry basic sillcock options.

Store a water hose key or four way water key in your toolkit or vehicle for routine maintenance and winterization. Use the tool responsibly, replace worn keys before they strip spigots, and call a licensed plumber when a valve resists safe operation. With the right 4 way sillcock key on hand, simple outdoor plumbing tasks stay efficient and damage-free.

Categories
Plumbing

How a John Guest Fitting Kit Saves Time on Repairs

Imagine a fitting that could substantially slash installation time, reduce leaks, and align with professional standards. Would it be worth considering for your next installation? John Guest Speedfit push-to-connect fittings are transforming plumbing. They make possible the quick connection of tubing without the need for tools. This innovation ensures rapid, reliable pipe connections. A patented locking mechanism helps provide leak-proof connections, even under pressure.

Visit website of Joh Guest
Speedfit fittings are available in engineered plastics and brass, so they can be used in various applications. They are ideal for potable water, beverage dispensing, and HVAC lines. For those in the U.S. seeking genuine John Guest Speedfit parts, Installation Parts Supply is a reliable distributor for both new installations and retrofits.

Important Points

  • John Guest Speedfit offers tools-free push-to-connect fittings for fast installations.
  • The patented locking system provides consistent, leak-resistant performance.
  • Materials include engineered plastics and brass for durability for broad compatibility.
  • Suitable for potable water, beverage, and HVAC applications.
  • Installation Parts Supply is a primary U.S. source for genuine Speedfit products.

Overview Of John Guest Speedfit Technology

John Guest Speedfit offers a practical way to connect pipes without soldering or tools. It uses a locking collet and O-ring seal for secure, leak-resistant joints. This method is favored for its tool-free assembly, which is ideal when time and cleanliness are critical.

Understanding John Guest Speedfit

Speedfit is a family of push-fit connectors designed for quick, reliable connections. It employs a gripping ring and elastomer seal to secure tubing and prevent leaks. This design is suitable for both temporary fixes and long-term plumbing needs, making it a popular choice among professionals and DIY enthusiasts.

Typical Uses And Industries

These connectors are used in potable water systems, beverage dispensing, and food processing where cleanliness is essential. HVAC condensate and control lines also benefit from their quick installation. Laboratories and some medical systems utilize certified variants. General fluid transfer and maintenance tasks also appreciate the fast assembly provided by jg fitting.

John Guest Fitting Kit

Compatibility And Materials

Speedfit accepts various tube types, including polyethylene and PVC, with options in plastic and brass bodies. Brass versions are more durable and suitable for higher temperatures. Select materials based on the fluid type, pressure, and temperature to ensure the right quick connect fittings for each application.

Product Feature Common Material Best Use
Push-fit system Delrin/plastic Fast potable water and low-pressure lines
Brass-bodied fittings Nickel coated brass Greater durability in demanding environments
Internal O-ring seal EPDM or NBR Reliable leak resistance for water and beverages
Tube compatibility PE, PVC, and PEX (varies) Choose by system spec and pressure needs
Common certifications NSF/WRAS where applicable Use in regulated potable and food systems

Benefits Of Using Push-To-Connect Fittings For Plumbing Solutions

Push-to-connect fittings offer significant advantages for contractors and DIYers. They provide fast, reliable connections, eliminating the need for soldering, crimping, or threaded joins. Tubing is simply seated against an internal stop, speeding up new builds, service calls, and temporary setups.

Installation Speed And Simplicity

Installers experience notable time savings with push-to-connect fittings. No special tools are needed, simplifying on-site work and reducing installation errors. Prefabricated assemblies assemble quickly, leading to faster project completion and lower labor costs.

Leak-Proof Connections And Reliability

The internal O-ring seal and secure locking mechanism ensure leak-proof connections. These connections withstand typical plumbing pressures and temperatures for rated materials. Properly cut tubing and insertion prevent failures from vibration and thermal cycles, unlike older methods.

Flexibility Plus Reusability

Many John Guest Speedfit fittings allow for disconnection and reuse, supporting system changes without waste. This flexibility is beneficial in beverage lines, lab setups, and prototype plumbing where frequent reconfiguration is common. A modular layout facilitates maintenance, reducing downtime.

Selecting The Right John Guest Speedfit Fitting For Your Project

Choosing the right jg fitting begins with a clear understanding of your system. Measure the tubing’s outside diameter accurately. Also, note the connection types you will use. Quick connect fittings make installation easier, but the wrong size or style can lead to leaks or poor flow.

Matching pipe size and connection type

Ensure the tubing OD matches the Speedfit product rating. Decide between straight connectors, barbed adapters, and threaded transitions for existing pipe fittings. A correct match minimizes rework and accelerates project completion.

Compatibility of materials and application-specific selection

Choose between plastic or brass based on mechanical and chemical requirements. For water and beverage lines, select materials certified for food contact. For aggressive chemicals or high temperatures, refer to compatibility charts for ohn guest fittings. Opt for materials designed for these conditions.

Pressure and temperature considerations

Verify the manufacturer’s pressure and temperature ratings for each john guest speedfit component. Ensure these ratings exceed your system’s maximum operating values. If your system’s peak conditions approach these limits, select a higher-spec jg fitting or a different material for safety and reliability.

If you have doubts, contact a reliable supplier or technical support. They can assist in choosing quick connect fittings and pipe fittings that meet your installation and performance requirements.

Reliable Piping Solutions Installation Best Practices

Proper installation is key to a system’s longevity, avoiding the need for frequent repairs. By following a few essential steps, you can ensure that your fittings work as intended. This is vital for systems handling water, beverages, and compressed air.

Tube preparation and correct insertion

Start by cutting the tubing with a high-quality tube cutter. A clean cut is essential to prevent leaks and protect the O-ring inside the fittings. It’s also important to remove any burrs and check the tube end for damage that could affect the seal.

Make sure the tubing’s outer diameter matches the fitting size. Mark the insertion depth on the tubing or refer to the manufacturer’s guide. Insert the tubing firmly until it hits the internal stop, ensuring a secure connection.

Testing and verifying leak-proof connections

After assembly, test the system at the recommended pressure. This step is critical to confirm that the connections are leak-proof under both static and dynamic conditions. It ensures the system’s performance over time.

For systems handling potable water and beverages, flush and sanitize them according to the relevant protocols before use. Visually inspect the joints and use soapy water if allowed to detect any leaks.

Maintenance and long-term reliability tips

Regularly check fittings for signs of wear, chemical damage, or mechanical stress. Replace any O-rings or fittings showing degradation to prevent larger failures. This proactive approach helps maintain the system’s reliability over the long term.

When disconnection is required, use the manufacturer’s release tool or follow their specified procedure. This avoids damaging the locking collar. Proper selection, installation, and regular inspections ensure that fittings remain dependable for years to come.

Procedure Step Task Why this matters
1 Cut tubing square and remove burrs Protects the O-ring and helps create a complete leak-proof seal
2 Check OD and mark the insertion depth Helps achieve a correct fit and avoids partial engagement in push-to-connect fittings
3 Perform a pressure test at the recommended level Confirms system integrity under expected operating conditions
4 Flush and sanitize drinking water lines Supports health compliance and prevents contamination in beverage systems
5 Plan periodic inspections Identifies wear before failure and supports long-term reliability
6 Use proper release tools during disassembly Protects locking collars and extends service life of fittings

Common John Guest Fittings And Configurations

John Guest fittings are essential for both home and business use. They make it easier to set up, fix, and upgrade water, refrigeration, and beverage systems. These fittings are designed for simplicity and efficiency.

The Speedfit range includes connectors for straight lines, 90° elbows for turns, tees for side connections, and reducers for size changes. Each fitting is made for quick assembly and to prevent leaks.

Specialty fittings enhance the system’s capabilities. Features like shut-off valves and quick-disconnects improve serviceability. Push-fit adapters connect to threaded systems, and bulkhead fittings ensure clean panel passage. Tools like tube cutters and release keys make installation and disassembly easier.

Use sizing charts and selection tools to find the right fit for your needs. Manufacturer catalogs detail compatible fittings and temperature limits. Resources like Installation Parts Supply and technical guides help with choosing the right parts.

Below is a concise comparison to aid selection. Check material compatibility and system pressure before finalizing parts.

Fitting Category Common Use Main Considerations
Straight fittings Connect or lengthen tubing runs Ensure tubing OD matches and confirm pressure rating
90° elbows Change flow direction in tight spaces Inner radius affects flow; confirm material
Tees Create branches for fixtures or sensors Balance flow; ensure proper sizing of branches
Reducers Transition between different tube sizes Limit pressure drop and follow size charts
Specialty accessories Bulkheads, valves, and quick-disconnect parts Pick according to access needs and installation demands

Choosing the right jg fitting and accessory ensures efficient and easy-to-maintain systems. Always cross-reference part numbers, check pressure and temperature specifications, and plan for easy access during piping layout.

Where You Can Buy John Guest Speedfit In The United States

Locating genuine John Guest Speedfit fittings requires selecting trustworthy suppliers and evaluating different purchase avenues. Choosing a reliable source can streamline project timelines, minimize return rates, and guarantee the authenticity of plumbing, beverage, and industrial components.

Wholesale distributor choices

Installation Parts Supply emerges as a leading choice among wholesale distributors for contractors and specifiers. They offer a wide range of sizes and configurations, provide competitive pricing for bulk orders, and ensure rapid shipping for large quantities. Partnering with a wholesale distributor ensures a consistent supply for recurring projects and lowers costs as project volumes increase.

Online retailers and local supply houses

John Guest Speedfit is available through numerous online retailers and local supply houses. Major industrial suppliers and online marketplaces feature Speedfit products, facilitating comparisons of part numbers, availability, and delivery times. It’s essential to verify return policies and authenticity assurances before making a purchase from unfamiliar sources.

Technical support and consultation

For projects requiring specialized fittings, engage with distributor technical teams or John Guest’s support for fitting recommendations. Installation Parts Supply provides consultation and part suggestions when deciding between push-to-connect options and specialized components.

When searching for where to buy John Guest Speedfit, consider stock levels, delivery speed, and customer support. By contacting various jg fitting suppliers and online retailers, you can compare prices and lead times effectively. This strategy ensures you obtain the precise fittings needed for your project with minimal delay.

Safety, Standards, And Compliance Considerations

Choosing the right fittings is more than just about fit and function. It involves ensuring safety standards and industry certifications are met. This is critical for potable water, food service, and industrial systems. Proper documentation is essential to mitigate risks during inspections and supports long-term asset management.

Ensure Speedfit products have necessary approvals like NSF/ANSI for drinking water and WRAS for UK compliance. Check for UL listings when dealing with electrical bonding or fire safety. Use fittings certified for food and beverage systems when sanitation rules apply. Keep certificates on file to demonstrate compliance for plumbing solutions.

Chemical and temperature limits

Before committing to an elastomer or polymer, review material compatibility charts. Some plastics and O-rings are susceptible to acids, solvents, or sanitizers used in food plants. Brass variants, on the other hand, offer broader resistance to harsh chemicals and can tolerate higher mechanical stress.

Examine the published temperature limitations for each fitting. Plastic push-fit fittings often have lower maximums than brass and may deform under sustained heat. It’s essential to match component ratings to expected operating temperatures to avoid premature failure in hot-water or steam-prone systems.

Best practices for compliance

Always follow local plumbing codes and manufacturer installation instructions. Conduct pressure and leak tests as required by authorities having jurisdiction and retain test records. For potable water and regulated beverage systems, follow sanitation protocols and use only certified materials.

Compliance Requirement What Should Be Verified Recommended Action
Product certifications Approvals such as NSF/ANSI, WRAS, UL, and NSF-51 where applicable Obtain certificates, confirm part numbers, and keep documentation
Compatibility with chemicals Charts for materials such as polyethylene, PEX, brass, EPDM, and NBR Review manufacturer data and perform spot tests if unsure
Operating temperature ratings Published maximum temperatures for short-term and continuous use Choose brass for hotter service and reduce plastic ratings where required
Installation Records Test records, sanitary flushing records, and inspector sign-off Store reports for plumbing solutions compliance and audits
Planned maintenance Inspection intervals, replacement schedule, approved spare parts Record the schedule, assign responsibility, and use certified parts

Final Thoughts

John Guest Speedfit offers a practical, time-saving solution for plumbing and fluid transfer. Its push-to-connect design ensures leak-proof connections. This supports a flexible plumbing system, ideal for commercial, residential, and light industrial projects.

Choosing the right parts is key. Match tubing OD, materials, and pressure and temperature ratings. Proper tubing preparation and testing guarantee reliable plumbing solutions over time. These fittings reduce labor time while maintaining performance, following manufacturer guidance.

For buyers in the United States, sourcing authentic John Guest Speedfit products is essential. Reputable distributors like Installation Parts Supply offer product availability and technical guidance. Always confirm certifications and application suitability before installation, using manufacturer resources and distributor support.

Categories
Plumbing

The Future of Smart Hose To Sink Adapters

Quick-connect systems are transforming the way water lines are connected in homes and gardens. They remove the need for wrenches, allowing for quick faucet hose attachment swaps. This convenience is a big improvement for both homeowners and gardeners. This guide is designed to support better buying decisions for your home and garden. It explores faucet adapters for hoses, various hose connector types, and brands like Claber, Melnor, and Dixon. Our aim is to guide you toward the best components for your needs.

This resource is about Hose Attachment For Sink Faucet
Whether you need a lightweight plastic quick connect for a standard outdoor spigot or a heavy-duty brass connector for higher pressure, this guide covers it. This section provides a clear comparison of performance, temperature limits, and warranty options to guide your selection.

Why Quick Connect Systems Matter For Garden And Home Watering

Quick connect systems transform the way hoses and taps are managed. They make routine jobs easier, simplify tool switching, and enhance both outdoor and indoor water use experiences.

Time-Saving Benefits Of Quick Connect Hose Fittings

Quick connect hose fittings allow hoses to be attached or detached quickly without tools. This significantly reduces task duration when switching between nozzles, sprinklers, or reels. Kits with built-in water stops eliminate the need for line draining, further saving time during hectic yard work.

Convenience For Indoor And Outdoor Use

Faucet adapters for hoses allow standard outdoor spigots and some sink fixtures to work with garden hose fittings. A hose adapter for sink or utility faucet simplifies rinsing, filling, and cleaning in the garage or laundry room. Brands like Claber offer adapters that prepare twist-on faucets for quick-connect systems, allowing seamless attachment transitions from hose to sink.

The Effect Of Quick Connects On Water Flow And Pressure

Flow characteristics can be influenced by the design of a hose connector. Valve-less brass quick connects often preserve flow, ensuring pressure for sprinklers and pressure washers. Models with internal valves or water-stop features may slightly reduce flow when engaged. Always check product specs for pressure ratings and compatibility with household systems, critical for high-pressure equipment users.

Adapter For Water Hose To Sink

Choosing Faucet Adapters For Hoses

When choosing a faucet to hose adapter, it is important to understand the available connector styles and material options. Knowing the types, materials, and tolerance limits helps you choose a faucet hose attachment that suits your needs and local climate.

Faucet adapter types and hose connector styles

A secure connection is provided by threaded faucet adapters that fit standard 3/4″ garden hose threads. Quick-connect male and female sets offer fast installation with a spring-loaded female that locks onto a push-fit male. Valve-less couplers provide simple, low-profile connections when shutoff valves are unnecessary. Sink-to-garden adapters convert indoor taps for temporary outdoor use, ideal for pressure washers or rinse stations.

Materials: brass hose fittings compared with plastic options

Durability and corrosion resistance are major strengths of brass hose fittings. Many opt for solid brass for its longevity and ability to withstand heavy-duty tasks. It’s important to avoid fittings that are merely brass-plated, as they wear out faster than solid brass. Plastic hose fittings, on the other hand, are lighter and resistant to some chemicals and UV. High-quality ABS options are suitable for seasonal use but may crack under long-term stress or freeze-thaw cycles.

Considering temperature and pressure tolerance

The choice of material significantly affects temperature and pressure performance. Brass quick-connect assemblies can handle a wider temperature range and higher PSI, sometimes up to about 200 PSI at nominal temperatures. Plastic adapters, in contrast, typically rate to roughly 104°F (40°C) and can fail below freezing. For year-round outdoor use, select a hose tap adapter rated for local cold snaps and high pressure, and drain hoses before freezing weather.

Choosing The Best Hose Connector For Your Faucet

The right hose connector makes watering tasks easier and helps prevent leaks. Begin by checking the thread size and connection type of your spigot or sink. A mismatch can lead to wasted time and potentially damage fittings if you force them to fit.

Match Thread Sizes And Connection Types

First, determine if your outdoor spigot uses the standard 3/4″ garden hose thread (GHT) or another type. Kitchen taps and specialty fixtures require specific hose adapters. Ensure you know whether you need male or female ends. Swivel adapters are ideal for flexible installations, while fixed adapters are better for permanent setups.

Check Build Quality And Warranty

Solid brass quick connect hose fittings are the better choice for durability in rough or high-pressure environments. For lighter options, UV-stabilized ABS plastic is suitable for sun-exposed areas. Look for brands like Melnor or Orbit, which offer clear warranties and return policies. A solid warranty is essential, whether you’re buying multiple pieces or shopping online.

Look For A Built-In Water Stop And Easy Swapping

When the female coupler is engaged, a water stop quick connect automatically shuts off the water. This feature allows for quick nozzle changes without needing to turn off the spigot or drain the line. Test the coupling action: push-pull rings are great for fast swaps, while threaded couplings are more secure for high-pressure tasks. Choose the style that best fits your needs.

Consider Kits Vs. Individual Adapters

A kit can be a convenient first-time solution because it includes all the required parts at once. A typical four-piece kit includes a faucet adapter, hose connector, and water-stop piece. For professionals, buying individual faucet adapters for hoses allows for more customization. Plumbers and contractors might prefer direct purchases from suppliers like Installation Parts Supply.

The decision should take cost, compatibility, and tool-swap frequency into account. A quick test fit at the point of purchase can save you from returns and keep your watering routine efficient.

Top Recommended Faucet-To-Hose Adapters And Quick Connect Options

The right faucet to hose adapter can help save time and reduce leaks. Below are top picks across plastic, value kits, and heavy-duty brass options. Each choice suits different needs from light seasonal use to professional-grade durability.

Best plastic faucet adapter for common outdoor taps

Made from UV-stabilized ABS plastic, the Claber 8458 Connector is a reliable Claber faucet adapter. It fits the common 3/4″ outdoor hose thread and performs well for seasonal garden tasks. This plastic option is affordable and light, which makes it a popular choice among homeowners who want simple garden hose fittings for moderate climates.

Best-value quick connect kit with water stop

For easy swapping without shutting off the water, consider the Melnor 15MQC 4-piece set. The Melnor quick connect kit includes a built-in water stop and user-friendly connectors for a clean faucet-to-hose adapter setup. Installation is straightforward: attach the faucet adapter to the tap, secure the faucet-end connector, fasten the female hose end, then click on your nozzle or accessory.

Best heavy-duty brass quick-connect fittings

Dixon brass fittings such as the DGH7 deliver rugged performance. These Dixon brass fittings are solid brass, corrosion-resistant, and rated for high pressures and wide temperature ranges. The design uses a push-pull ring for fast operation and avoids flow restriction when disconnected, making it ideal for demanding garden and commercial applications.

Tips for installation and compatibility

  • Always shut off and drain the water before a first-time install to prevent mess and unexpected pressure issues.
  • Match threads: most U.S. hoses use 3/4″ GHT. Verify thread size before buying any faucet to hose adapter.
  • To install quick connect hose fittings, place the female connector on the hose, attach the male to the accessory or adapter, and push until the spring-loaded ring locks.
  • In colder climates, remove and store hose adapters to avoid cracking and freeze damage.

Where to buy and what to check from suppliers

Buy from reputable retailers and plumbing wholesalers for authentic garden hose fittings and warranties. Installation Parts Supply and major home centers list plumbing-grade faucet to hose adapter options and quick connect hose fittings. Look for clear specs on pressure rating, temperature range, material, and warranty to match the product to the intended use.

Product Category Construction Material Key Feature Best Use
Claber 8458 Connector model Adapter fitting Plastic UV-stabilized; fits 3/4″ thread Seasonal garden watering
Melnor 15MQC kit Quick connect kit Plastic and metal reinforcements Easy swap design with built-in water stop Convenient home watering setups
Dixon DGH7 fitting Quick-connect fitting Brass Valve-less design; rated to 200 PSI High-pressure and cold climates
Generic garden hose fittings Hose adapters and connectors Plastic or brass Different thread and sealing types Everyday hose repairs and replacement tasks

Final Thoughts

For homeowners and professionals alike, quick connect hose fittings can save significant time and effort. Whether opting for a plastic faucet-to-hose adapter for occasional use or a solid brass one for heavy-duty tasks, ensuring thread size compatibility and checking pressure and temperature ratings is key. This ensures leak-free and reliable connections.

Plastic garden hose fittings, including ABS models from Claber, are affordable and simple to use. On the other hand, brass hose fittings from Dixon are more durable and can handle higher pressures. Melnor’s kits are perfect for frequent nozzle or sprinkler changes, thanks to their built-in water stop feature.

Material quality, warranty terms, and hose connector compatibility should all be checked before purchasing faucet adapters for hoses. For large orders or professional-grade parts, consider established distributors like Installation Parts Supply. They offer warranties and the right components for long-term performance.